Monday, July 15, 2013

Tuesday, July 2, 2013

When Life gives you Lemons, Make Lemon Sugar Cookie Bars!!


The Inspiration…
          Summer time… Sunny, bright skies; vacations to amazing places; cannon balls in the pool; lathering up the sunscreen; sunglasses everywhere… What is the one part of summer I forgot to mention?
          A tall glass of Lemonade!!! I LOVE lemonade, it is my all-time favorite drink! But, as we all know, lemonade isn’t a dessert, but a wonderful refreshing drink, right? Well, I have a fantastic dessert that will fulfill your lemony needs :0)
          Lemon  Sugar Cookie Bars! These cuties are the golden summer time treat, but I recommend eating them after they have chilled, because it really brings out the flavor of the lemon! Plus, anything tastes better cold in the crazy hot summer months! :0) Who could go wrong with a delicious lemon cookie topped with a refreshing lemon frosting? Can you say “YYYYYUUUUUMMMMM!!!!” :0)
          If you are looking to print this recipe, I have put all of the directions and ingredients all together toward the way bottom of the blog, without all of the pictures so it is more easy to print :0) Hope it helps!

The Recipe…
After hunting around Pinterest, I found a recipe from Chocolate, Chocolate and More and gave it a twist, hope you LOVE it!!
Ingredients:
For the cookie dough-
·        1/2 cup butter, room temperature
·        1 cups granulated sugar
·        2 large eggs
·        The juice of ½ a lemon
·        2 1/2 cups all-purpose flour
·        1/2 teaspoon salt
·        1/4 teaspoon baking soda
For the frosting-
·        1/4 cup butter
·        1/4 cup shortening
·        Juice of the other half a lemon
·        Pinch of salt
·        2 cups powdered sugar
·        1-3 tablespoons of milk
·        yellow food coloring
Directions:

For the Cookie...

Step 1: In a large bowl, cream butter and sugar until fluffy, about 5 minutes.
 
Step 2: Add in eggs, one at a time, and lemon zest and juice
 
Step 3: In a separate bowl, combine flour, salt and baking soda.
 
 
Step 4:  Slowly add flour mixture to butter mixture, (I did mine in 3 batches) just until combined.

 
Step 5: Spread dough into a greased 9x13 pan, using your hands to completely cover pan evenly with dough.

 
Step 6: Bake for 10-15 minutes in a 375* oven, until just starting to turn golden. Remove from oven and let cool completely before frosting.

For the Frosting...

Step 7: Combine butter and shortening, beating until smooth.
 
Step 8: Add in lemon juice and salt, beat again
  Step 9: Slowly add in powdered sugar until smooth.
 
Step 10: Add in a few drops of yellow food coloring to give it a "Lemony Look"
 
Step 11: Once the cookie has baked and COOLED, frost the cookie with your lemon-frosting. Then place in the refrigerator for a few hours to let it set. ENJOY!!!
 

Lemon Sugar Cookie Bars

Ingredients:
For the cookie dough-
·        1/2 cup butter, room temperature
·        1 cups granulated sugar
·        2 large eggs
·        The juice of ½ a lemon
·        2 1/2 cups all-purpose flour
·        1/2 teaspoon salt
·        1/4 teaspoon baking soda
For the frosting-
·        1/4 cup butter
·        1/4 cup shortening
·        Juice of the other half a lemon
·        Pinch of salt
·        2 cups powdered sugar
·        1-3 tablespoons of milk
·        yellow food coloring
Directions:

For the Cookie...

Step 1: In a large bowl, cream butter and sugar until fluffy, about 5 minutes.
Step 2: Add in eggs, one at a time, and lemon zest and juice
Step 3: In a separate bowl, combine flour, salt and baking soda.
Step 4:  Slowly add flour mixture to butter mixture, (I did mine in 3 batches) just until combined.

Step 5: Spread dough into a greased 9x13 pan, using your hands to completely cover pan evenly with dough.
Step 6: Bake for 10-15 minutes in a 375* oven, until just starting to turn golden. Remove from oven and let cool completely before frosting.

For the Frosting...

Step 7: Combine butter and shortening, beating until smooth.
Step 8: Add in lemon juice and salt, beat again
Step 9: Slowly add in powdered sugar until smooth.
Step 10: Add in a few drops of yellow food coloring to give it a "Lemony Look"
Step 11: Once the cookie has baked and COOLED, frost the cookie with your lemon-frosting. Then place in the refrigerator for a few hours to let it set. ENJOY!!

Thursday, June 20, 2013

Granola Bars! Yay :0)


 The Inspiration...

           Big, little, sweet, salty, there are many versions of granola bars! I have been a fan of the cute, little snack for a while, and they come in handy when you need a quick bite. I found that if I made my own granola bars, I could put EXACTLY what I wanted inside them, and leave out anything that I don’t want in my granola bar too! 

           This is perfect timing, since I need a snack after my hour and a half workout in the pool, starting at 6:20 a.m. (I am a swimmer on a swim team. GO SHARKS!!) After I did my homework: researching different recipes on these little guys, I found the recipe I loved the most...Alton Brown’s recipe from Food Network, but I changed up a few things to his recipe to make it mine. (A good chef turns a simple recipe into their own with a few little touches :0) 

           If you are looking to print this recipe, I have put all of the directions and ingredients all together toward the way bottom of the blog, without all of the pictures so it is more easy to print :0) Hope it helps! 

 The Recipe… 

           For these granola bars, you can switch around many different ingredients if you don’t like some. Add more of one ingredient, or less of another, whatever is going to taste great for you! Also, as I‘m eating up theses granola bars, I found that there are many other ways that you can eat them up. I tried crumbling them up on top of yogurt (YUUUUUMM!) And my Mom thought of crumbling them up onto her oatmeal! There are endless possibilities… Let’s get to it! You’re going to want to eat these as soon as you can! 

Ingredients you will need: 
  • 2 cups Rolled Oats 
  • 1 1/2 cups of Chopped Nuts ( I used Almonds and Brazil nuts) 
  • 1/2 cup of Wheat Germ 
  • 1/2 cup of Honey 
  • 1/4 cup packed Brown Sugar 
  • 2 Tbsp. Unsalted Butter 
  • 2 tsp. Vanilla Extract 
  • 1/2 tsp. Salt 
  • 6 oz. Dried Fruit ( I used dried cranberries, semi chopped) 
  • 1 cup of Mini Chocolate Chips 

 Step 1: Preheat the oven to 350*, evenly spread rolled oats, chopped nuts, and wheat germ on a cookie sheet. Toast them in the oven for 15 minutes, stirring occasionally. (I stirred them every 5 minutes) 


Step 2: In the meantime, combine honey, brown sugar, butter, vanilla, and salt into a medium sauce pan or pot. (Make sure it is big enough to hold all of your toasted oat mixture) Heat the pot on medium heat, and stir the mixture until the brown sugar is completely dissolved (The sugar will melt quickly) 


Step 3: Gather your dried fruit and chocolate chips to add into the bar. I semi chopped the fruit to make the pieces smaller and more bite sized. 


Step 4: Once the oat mixture is toasted completely, take it out of the oven and reduce the oven temperature to 300* 


Step 5: Immediately add your oat mixture into your pot/pan, and stir until your oats are completely covered in the honey mixture. Then, add in your dried fruit and chocolate chips and stir until combined. 


Step 6: Take your granola bar mixture and dump it into a prepared, greased 9x9” pan. Press the granola mixture until there is an even layer of granola bar in the pan. 


Step 7: Bake the bars in a 300* oven for 25 minutes.  Let them cool completely and ENJOY!! 


Granola Bars:
Ingredients you will need: 
  • 2 cups Rolled Oats 
  • 1 1/2 cups of Chopped Nuts ( I used Almonds and Brazil nuts) 
  • 1/2 cup of Wheat Germ 
  • 1/2 cup of Honey 
  • 1/4 cup packed Brown Sugar 
  • 2 Tbsp. Unsalted Butter 
  • 2 tsp. Vanilla Extract 
  • 1/2 tsp. Salt 
  • 6 oz. Dried Fruit ( I used dried cranberries, semi chopped) 
  • 1 cup of Mini Chocolate Chips 
Directions:

 Step 1: Preheat the oven to 350*, evenly spread rolled oats, chopped nuts, and wheat germ on a cookie sheet. Toast them in the oven for 15 minutes, stirring occasionally. (I stirred them every 5 minutes) 
Step 2: In the meantime, combine honey, brown sugar, butter, vanilla, and salt into a medium sauce pan or pot. (Make sure it is big enough to hold all of your toasted oat mixture) Heat the pot on medium heat, and stir the mixture until the brown sugar is completely dissolved (The sugar will melt quickly) 
Step 3: Gather your dried fruit and chocolate chips to add into the bar. I semi chopped the fruit to make the pieces smaller and more bite sized. 
Step 4: Once the oat mixture is toasted completely, take it out of the oven and reduce the oven temperature to 300* 
Step 5: Immediately add your oat mixture into your pot/pan, and stir until your oats are completely covered in the honey mixture. Then, add in your dried fruit and chocolate chips and stir until combined. 
Step 6: Take your granola bar mixture and dump it into a prepared, greased 9x9” pan. Press the granola mixture until there is an even layer of granola bar in the pan. 
Step 7: Bake the bars in a 300* oven for 25 minutes.  Let them cool completely and ENJOY!! 

Saturday, June 8, 2013

Hot Chocolate...but Cooler :0)


The Inspiration...

           Sip. Gulp. Sip. Gulp. Ahhhhhhh...Nothing better than a nice warm cup of hot chocolate on a cold overcast morning. (I know...Summer time is hot, but not where I'm vacationing this week, we have GREAT Hot Chocolate drinking weather :0)I always wait a few minutes after I whip up my cup so that my eager gulp of cocoa doesn't wind up burning every taste bud in my mouth. So in a way, I guess I'm not really having a cup of "Hot Chocolate" but more of a cup of "Warm, almost cold Chocolate", I know what your thinking... How can you drink hot chocolate like that? Well, you will find that I am a "One of a kind" or in other words an "Odd Ball" (Just wait, I'll grow on you :0) Don't worry... a cooled off cup of hot chocolate isn't what I mean when I talk about a "Cooler" cup of hot chocolate. My idea is MUCH better than that!

        Now... If you get to reading this recipe and decide hot chocolate isn't the drink for you, you can always switch out hot chocolate for coffee, my younger sister tried out the coffee version and said it tasted just as great, I'm not as much of a coffee drinker as she is, so I left the coffee test to her. Find which drink you like best, and enjoy the delicious change!

       If you are looking to print this recipe, I have put all of the directions and ingredients all together toward the way bottom of the blog, without all of the pictures so it is more easy to print :0) Hope it helps!

The Recipe...


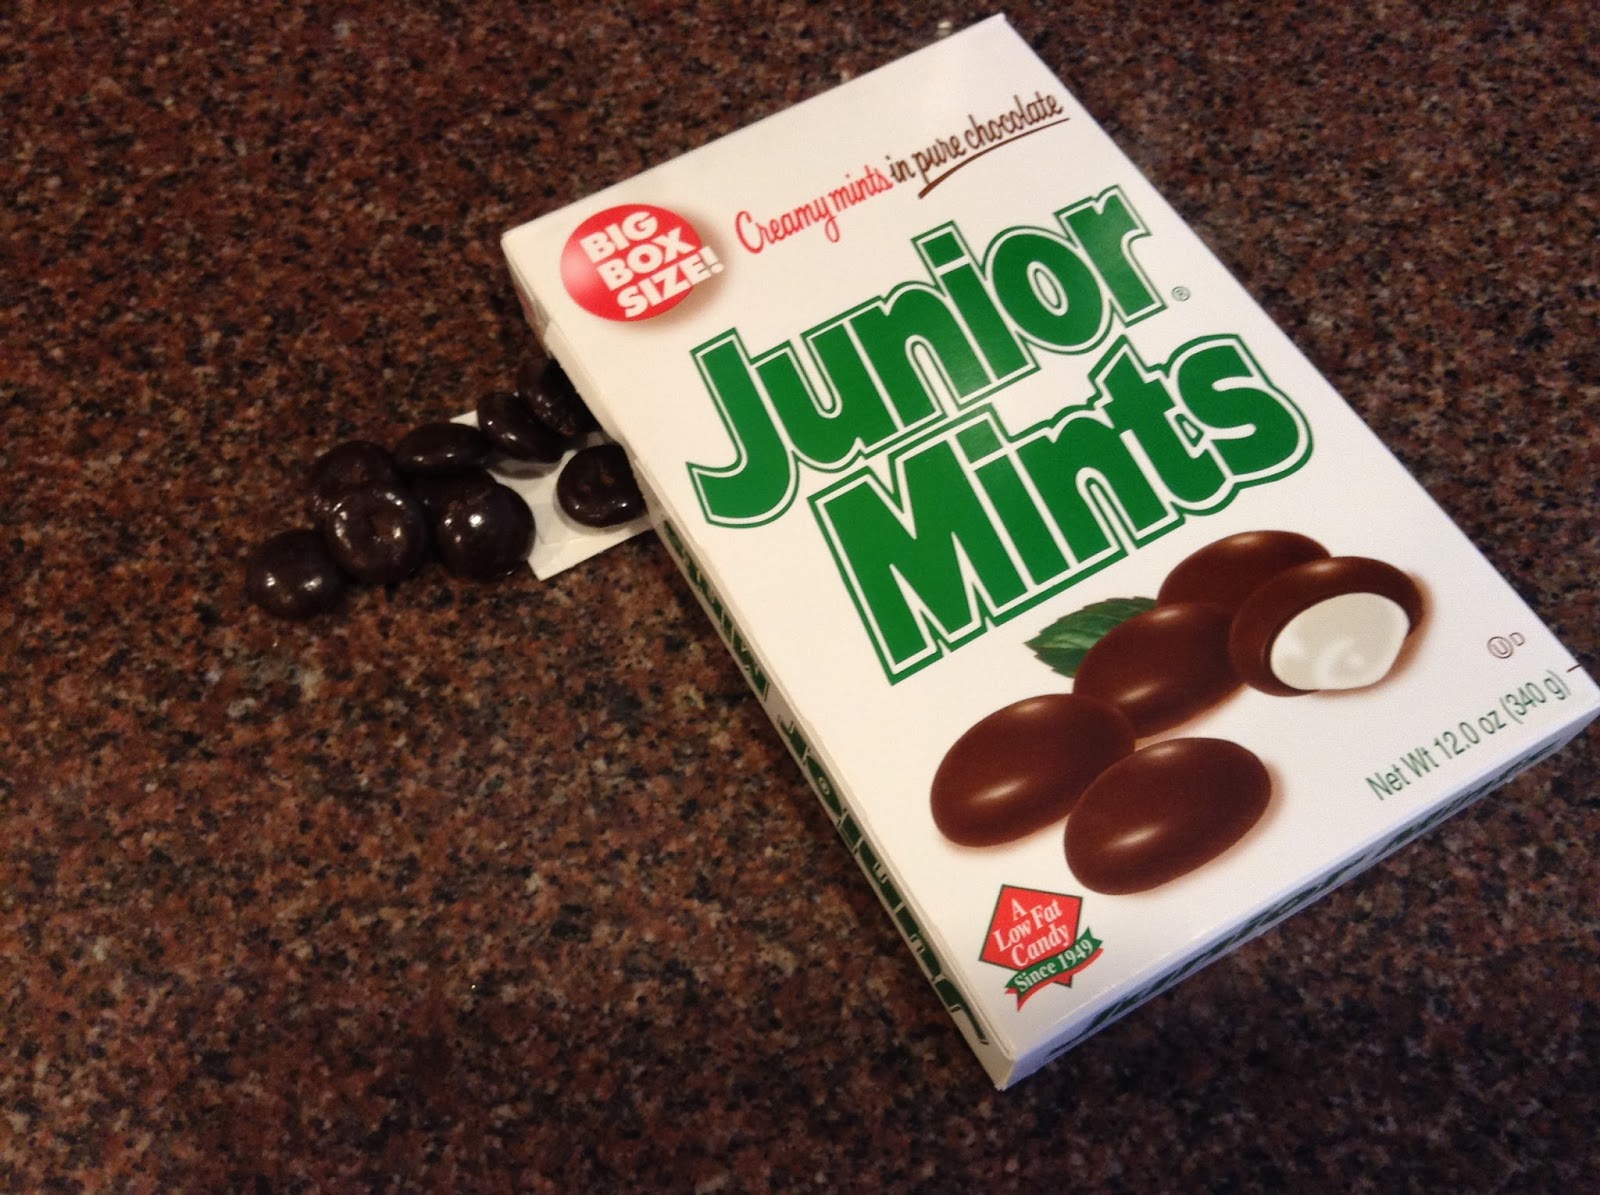
          For this recipe, I was looking around the hotel kitchen and found something that I thought would be great! Something that I thought would taste AMAZING and give a normal cup of hot chocolate a little minty twist! We had a few left over snacks from the road trip over here, and I decided this little candy would be even better than a swirl of a candy cane that you use around Christmas time! Ready for it... My secret ingredient was...


 Yep!! Junior Mints, can you say YUUUUUUMMY!!! The creamy mint melts into the steaming hot chocolate giving it a hint of mint, and a wonderful smell, not to mention the delicious chocolate around the Junior Mint that melts into the drink too!


For this Recipe, you will need...

  • 1 microwavable safe coffee cup (Filled with water)
  • 1 package of Swiss miss Hot Chocolate Mix (or any other hot chocolate mix you can find)
  •  A few Junior Mints
  • Optional: mini marshmallows for topping


Step 1: Put the microwavable safe coffee cup filled with water into the microwave for about 45-60 seconds, until the water is boiling hot, or steam is coming out (You know what to do, you have made hot chocolate before :0)


Step 2: Once the water is hot enough, immediately pour the hot chocolate powder into the water so the dehydrated chocolate turns into hot cocoa, don't go anywhere, step 3 is very important during this time period too!


Step 3: While the hot chocolate is still hot and steamy, preferably right after you stir the hot chocolate mix into the hot water, drop 1-3 Junior Mints into the hot chocolate, just to get the minty light flavor into the hot chocolate. (I used 1 junior mint for my cup)


Step 4: Optional- I have found that putting the mini marshmallows in the hot chocolate while it's hot makes the hot chocolate even better because the marshmallows soak up the cocoa, but I have found that some people like their marshmallows in their cocoa right before they drink it, so what ever you like best, go for it, it's your hot chocolate!


Step 5: ENJOY!!!


Junior Mint Hot Chocolate:

Ingredients:

  • 1 microwavable safe coffee cup (Filled with water)
  • 1 package of Swiss miss Hot Chocolate Mix (or any other hot chocolate mix you can find)
  •  A few Junior Mints
  • Optional: mini marshmallows for topping

  • Directions:
    1. Put the microwavable safe coffee cup filled with water into the microwave for about 45-60 seconds, until the water is boiling hot, or steam is coming out (You know what to do, you have made hot chocolate before :0)
    2. Once the water is hot enough, immediately pour the hot chocolate powder into the water so the dehydrated chocolate turns into hot cocoa, don't go anywhere, step 3 is very important during this time period too!
    3. While the hot chocolate is still hot and steamy, preferably right after you stir the hot chocolate mix into the hot water, drop 1-3 Junior Mints into the hot chocolate, just to get the minty light flavor into the hot chocolate. (I used 1 junior mint for my cup)
    4. Optional- I have found that putting the mini marshmallows in the hot chocolate while it's hot makes the hot chocolate even better because the marshmallows soak up the cocoa, but I have found that some people like their marshmallows in their cocoa right before they drink it, so what ever you like best, go for it, it's your hot chocolate!
    5. ENJOY!!